Blue Loctite, a popular and widely used thread-locking compound, helps secure fasteners and prevent them from loosening due to vibrations, shock, or temperature changes. It is a semi-permanent adhesive, which means that it is strong enough to hold fasteners in place, but can still be removed with the right techniques.
The process of removing Blue Loctite involves applying heat, using mechanical force, or applying a chemical solvent to dissolve the adhesive. It is essential to choose the right method and tools for the job, as well as to follow safety precautions to prevent damage to the components and any potential injuries.
Diving into this comprehensive guide, you will gain a thorough understanding of various methods to remove Blue Loctite, the tools and materials needed, and the safety precautions to follow. So, let’s embark on this journey together and master the art of removing Blue Loctite effectively.
Identifying Blue Loctite
Blue Loctite on Threaded Parts
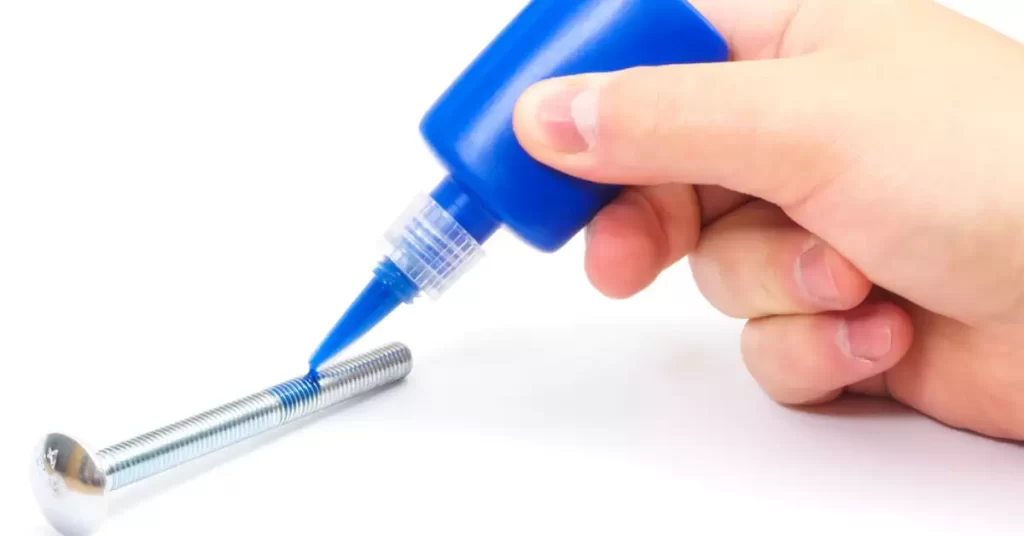
Blue Loctite can be identified by its distinct blue color, which is visible when applied to threaded parts such as screws, bolts, and nuts. The adhesive is typically applied to the threads before assembly, and once the fastener is tightened, the compound cures to form a strong bond.
Common Applications and Places You Might Encounter It
Blue Loctite is commonly used in various industries, including automotive, aerospace, and manufacturing. It can also be found in everyday items like bicycles, electronics, and appliances. Some specific examples of where you may encounter Blue Loctite include:
- Automotive repair and maintenance tasks, such as securing engine parts or suspension components.
- Assembling and maintaining bicycles, where it is used to secure bolts and prevent them from loosening due to vibrations.
- Securing screws and fasteners in electronic devices, such as computers and smartphones.
Tools and Materials Needed for Blue Loctite Removal
Heat Sources
Heat is an effective way to weaken the bond created by Blue Loctite, making it easier to remove. Common heat sources for this purpose include heat guns and propane torches. When choosing a heat source, consider the type of material you’re working with and the amount of heat required to soften the adhesive.
Pliers or Wrenches
When removing Blue Loctite, you may need to apply mechanical force using tools like pliers or wrenches. These tools help grip the threaded parts and provide the necessary leverage to unscrew them. Choose the appropriate size and type of tool for the specific component you’re working on.
Chemical Solvents
In some cases, chemical solvents can be used to dissolve Blue Loctite and break down the adhesive bond. Some solvents that can be effective include acetone, isopropyl alcohol, and commercial Loctite removal products. Be sure to follow the manufacturer’s instructions and safety guidelines when using chemical solvents.
Safety Equipment
When removing Blue Loctite, it’s essential to wear appropriate safety gear, including gloves and eye protection. This will help prevent injuries from heat, mechanical force, or chemical exposure.
Safety Precautions When Removing Blue Loctite
Protecting Your Eyes and Skin
When working with heat sources, tools, and chemicals, it’s crucial to protect your eyes and skin from potential harm. Wear safety glasses to shield your eyes from flying debris, heat, and chemical splashes. Additionally, wear gloves to protect your hands from burns, cuts, and chemical exposure.
Ventilation and Chemical Safety
When using chemical solvents to remove Blue Loctite, ensure that you’re working in a well-ventilated area. This will help prevent the buildup of toxic fumes that can be harmful if inhaled. Follow the manufacturer’s instructions for safe handling and disposal of the chemicals, and use a respirator if needed to protect yourself from potentially harmful vapors.
Avoiding Damage to the Components
To prevent damage to the threaded parts and surrounding components, use caution when applying heat, force, or chemicals. Avoid applying excessive heat to temperature-sensitive materials or using excessive force that could strip the threads or damage the parts.
When using chemical solvents, ensure they are compatible with the materials you’re working with, and apply them only to the area where the Blue Loctite is present.
Methods for Removing Blue Loctite
1. Applying Heat
Using a Heat Gun or Propane Torch
Applying heat to the threaded parts can soften the Blue Loctite and weaken the bond, making it easier to unscrew the fasteners. A heat gun or propane torch can be used for this purpose.
Direct the heat evenly around the threaded area, taking care not to overheat the component or surrounding materials. Once the Blue Loctite has softened, proceed to remove the fastener using pliers or a wrench.
Techniques for Heating the Parts Evenly
To heat the parts evenly, slowly move the heat source around the threaded area in a circular motion. Be patient and allow the heat to penetrate the adhesive before attempting to unscrew the fastener. If you’re using a propane torch, maintain a safe distance from the part to prevent scorching or damage.
Cooling the Parts Before Handling
After heating the parts and removing the fastener, allow the components to cool before handling them. This will help prevent burns and ensure that the remaining Blue Loctite has solidified, making it easier to remove any residue.
2. Mechanical Force
Properly Gripping the Parts
To remove Blue Loctite using mechanical force, grip the threaded parts securely with pliers or a wrench. Ensure that the tool is appropriately sized for the component to prevent slipping or damage to the threads.
Techniques for Applying Force Without Damaging Threads
Apply steady, controlled force when unscrewing the fastener to prevent damage to the threads. If the fastener is difficult to turn, try using a larger tool for more leverage, or consider applying heat or a chemical solvent to loosen the adhesive before proceeding.
3. Chemical Solvents
Types of Solvents That Can Dissolve Blue Loctite
Some solvents that can dissolve Blue Loctite include acetone, isopropyl alcohol, and commercial Loctite removal products. These solvents can help break down the adhesive bond, making it easier to remove the fastener.
Application Methods and Waiting Times
Apply the solvent directly to the area where the Blue Loctite is present, using a brush, cotton swab, or spray applicator. Allow the solvent to penetrate the adhesive for the recommended time, which may vary depending on the specific product used. Once the Blue Loctite has softened, proceed to remove the fastener using pliers or a wrench.
Safety Considerations When Using Solvents
When using chemical solvents, wear gloves and eye protection to prevent chemical burns or irritation. Work in a well-ventilated area, and follow the manufacturer’s instructions for safe handling and disposal of the chemicals.
4. Cleaning and Reassembly After Blue Loctite Removal
Removing Any Remaining Residue
After removing the fastener, clean the threads to remove any remaining Blue Loctite residue. This can be done using a wire brush, a cloth, or a solvent-soaked cotton swab, depending on the amount of residue and the size of the threaded parts.
Ensuring that the threads are clean will help prevent any issues when reassembling the components and will provide a better bond if you choose to reapply Loctite.
Inspecting the Components for Damage
Before reassembling the parts, inspect the threads and surrounding components for any signs of damage. Look for stripped threads, cracks, or deformation that may have occurred during the removal process. If you find any damage, consider replacing the affected components to ensure a secure and safe reassembly.
Reassembling the Parts and Applying New Loctite If Needed
Once the components are clean and inspected, reassemble the parts as required. If you need to reapply thread-locking adhesive, consider using Blue Loctite or an alternative thread-locking solution, depending on the specific application and strength requirements. Follow the manufacturer’s instructions for applying the adhesive and tightening the fasteners.
Preventative Measures for Future Blue Loctite Removal
Proper Application Techniques to Minimize Removal Difficulties
When applying Blue Loctite, follow the manufacturer’s recommendations for the appropriate amount and application method. This will help ensure a secure bond while minimizing the potential difficulties when removing the adhesive in the future. Be sure to clean and degrease the threads before applying the adhesive to improve bonding and prevent contamination.
Alternative Thread-Locking Solutions
If you find that Blue Loctite is too difficult to remove or not suitable for your specific application, consider using alternative thread-locking solutions. These may include different grades of Loctite with varying strengths, thread-locking tapes, or mechanical locking devices like lock washers or locking nuts.
Maintenance and Inspection Routines
Regular maintenance and inspection of threaded components can help identify any issues before they become more significant problems. Look for signs of loosening fasteners, damage to threads, or leaks that may indicate a need for repair or replacement. Addressing these issues promptly can help prevent more extensive damage and make future Blue Loctite removal easier.
Frequently Asked Questions
Can I reuse a fastener after removing Blue Loctite?
Yes, you can reuse a fastener after removing Blue Loctite, as long as the threads and surrounding components are in good condition. Clean the threads thoroughly to remove any residue before reassembling and reapplying Loctite if needed.
How long does it take for Blue Loctite to cure?
Blue Loctite typically takes about 10 minutes to set and 24 hours to reach full cure strength. However, this may vary depending on the specific product used and the environmental conditions, such as temperature and humidity.
Is there a difference between Blue Loctite and Red Loctite?
Yes, there is a difference between Blue Loctite and Red Loctite. Blue Loctite is a medium-strength thread-locking adhesive designed for easy removal with standard hand tools. Red Loctite is a high-strength adhesive that requires heat and more force for removal, making it more suitable for permanent or long-term applications.
Conclusion
Mastering the art of removing Blue Loctite effectively requires understanding the various methods available, such as applying heat, using mechanical force, or applying chemical solvents. Equally important is choosing the right tools and materials for the job and adhering to safety precautions to prevent damage to components or injuries.
By following the guidelines and techniques outlined in this comprehensive guide, you can confidently remove Blue Loctite from threaded parts and ensure a successful reassembly or repair. So, whether you’re working on a small home project or a large-scale industrial application,
